Sunday, October 4, 2009

More soak wells go in....


Added 8 "VersiTank" soakwells to the north East corner of site.....
Big Hole.
Christian loves digging.
(Can you sense the sarcasm in above sentence?)


Sunday, July 26, 2009

First Level of the Toilet Block.

First Level of the toilet block goes up - Bricks shown here are 200x200x600 eco bricks. They are aerated concrete. On the interior, we will have drywall or render; and on the exterior, our famous red metal! Jerry, a mate of a mate, happens to be a brickie and knocked this up on a weekend.....
Now we must wait for the precast slab to be delivered and we will build up the next level afterwards..............

long way to go yet!


Wednesday, July 15, 2009

THE SLAB IS IN

got there at 6.30 am
sunrise over site


concrete pump arrives


finishing touches


concrete truck arrives too

beautiful formwork


view towards scarborough beach road standing on the scaffold


the boss is smiling

the first bit goes in

pour pour

a tight fit in the laneway

pour pour

more pour - the concrete will be exposed, so we used a coloured conrete - Charcoal.

footings are poured

slab is poured

"slightly dodgy (but-not-so-dodgy) edge detail"
:-)

The Secret of the Upstand Beam

.................continued from the last post

Since we are building straw bale infill walls in a timber framed construction, we needed to create a raised upstand on the perimetre for the bales to site on. Not only would this keep the bales dry and off the ground, it would also give us a exposed concrete footing (sans joints) to track and keep a check on any termites.


We already have quite a height restriction on the site, so the only way we could achieve the 2 and half floors we wanted at a 9m finished roof height was to make sure the interior finished floor level was at the same as the external finished level. The raised upstand was really the only option.


When we did a presentation of the project for our colleagues at work (who also all coincidentally happen to be architects), one of the things that was raised was our upstand detail. Everyone agreed it was expensive, excessive, and no builder would attempt it without dumping a "risk or contingency" chunk over the cost.


We have a C channel running along the inner edge of the upstand which we hoped would double up as formwork and later on as a continuous ducting recess behind a skirting board. The problem was -how do we suspend this channel in mid air while concrete is poured under it.

We finally worked out a system where we screwed equal lengths of 100mm widths of the standard plywood at intervals on the C channel. These were then screwed back onto the main external formwork at intervals - the external plywood was held in place by bamboo stakes driven into the ground.

The C channels were then supported on double stacks of standard plastic concrete chairs which were rested on the reinforcement bars cantilevering into the footing.

Now this held the C channels in place in principle, however, the weight of the concrete against the plywood would surely bend the entire thing out of shape!

The concreter we hired for Wednesday morning (morning of the pour) came around to have a quick check - i think he didnt trust 3 architects trying to do his job ;-) - quite rightly....!

The plywood was far too unstable to hold in the concrete. So his suggestion was simple and effective - drive in metal stakes at intervals into the ground surrounding the external formwork and wedge in more ply panels using the metal stakes as a sturdy support.

Once that was done, the formwork wouldnt even yield an inch!

Christian and Gian heaved a sigh of relief!

And we didnt bother to calcuate how much money we saved by doing it ourselves.... :-)


Ground Floor Slab and Footings

The two weeks leading up to today was one of great tensions, exhilaration, physical prowess and emotional breakdowns.
Well ok I am exaggerating on the emotional breakdown part of it. We were pretty flat out, and there was no time for any breakdowns.

Before I digress and start the chatter, I need to say a MASSIVE THANKS to Gian, without whom our crazy deadline would have gotten the better of us. Thanks to his common sense, great practical ideas, and most important his availability, we were able to complete the formwork in time for the pour, and in perfect timing - 12 hours before the start of the most rainy week Perth has had this year… A day late, and we would have had to postpone the pour, and the rain would have ruined our prepared trenches. So the timing was fantastic.

When Christian suggested we build the plywood formwork ourselves, I was quite confident that we would be able to manage it. We had a fantastic set of tools, which we were both starting to get better and better at using. We planned to do the entire formwork out of 16mm plywood and spent a lot of time working out the complicated edge upstand detail. We spent the weekend of the 4th and 5th digging more trenches and testing the edge detail on site – and we thought we might just be able to pull it off…..


Gian spent most of the 2 weeks leading up to this day finishing the trenches, cutting the reinforcement to size and prefabricating the upstand formwork so we could attach it on. On the weekend, we managed to start setting up the formwork, and the Sunday, Monday and Tuesday were absolute crazy with Gian working all day on site, Christian joining him by afternoon, me in the evening, and us trying to work till 11 or 12 at night on site making as little noise as possible!!


Here are some photos of the formwork before the concrete was poured. I will try to explain as best as I can for those non-architects out there who are interested.


Our slab is a 100mm thick concrete slab, with a 30mm thick foam insulation under it (the blue stuff). Under the foam insulation, we have a waterproofing layer – which is the thick black plastic stuff. The waterproofing layer needs to be sealed, so where it overlapped, or where it had a hole for pipes or penetrations to go through, we sealed it up with heavy duty tape.


We needed a lot of tape.


And when I was sent to Bunnings to buy more tape, I came back with 5 different colours, much to Chritians amusement – but they were all so cool! Anyway, if anyone digs up our slab in the future they will find patches of bright red, lemon yellow, cobalt blue, sour green colours of haphazard taping all over.

Wonderful!

Anyway, the slab sits on a footing of approximately 600 to 700mm wide x 300mm deep that runs the full perimeter of the slab. Now if we had stopped there, the formwork would have been easy.

But we didn’t.

Since we are building straw bale walls, we wanted to create a raised upstand on the perimetre for the bales to site on.

(to be continued................................)

Sunday, June 14, 2009

The first concrete pour that never was.

The Saturday morning started in disappointment when the Boral concrete truck which was due to arrive at 12.30 didn’t turn up and couldn’t be contacted. The first concrete pour didn’t happen as scheduled – however things started looking brighter soon afterwards. We had a fantastic turnout of friends who came bringing boots shovels anvils boyfriends et al. Great thanks to Glen, Eddie, WhyeKay, Kate+Gian, Marco+Charlotte, Anne, Craig+chisel, Bec+funny-looking-custom-made-trench-digging-tool. You guys are fantastic and fabulous, and I can’t believe we got so much done! Our hole for the rainwater tanks is big enough, and most of our trenches are already dug! A very special mention to young Charlotte who might be 2 years old but handles her mini shovel like a pro, and looks absolutely cool when sitting in a wheelbarrow. Special mention also to the limestone we hit when digging deeper into the rainwater tank hole. Gian, Eddie and Craig are true rocksmiths, and wield a mean chisel! We then had a barbeque and bonfire on site before heading home where others joined and the party grew and grew.


Glen, its gotta be thiiiiiiiiiiiis big.....


Grrrrr mmmmppfffffff!!!


craig: "i wonder if that's in the right spot?"


Christian and I spent most of the next day finishing up and installing the rainwater tanks. We ordered the Concrete Taxi for first thing Monday morning, as we needed to pour it quick before it rained into the footing.

Thursday, June 11, 2009

Big huge freaking massive tanks ...

...have arrived on site and we realised our hole dug with the excavator isn’t big enough.
Here are some photos of our first trenches for the toilet block – we are lining this with black foil to prevent the sides from collapsing. The structural drawings have been referred to in earnest and appropriate reinforcement has been added and tied down. We need to pour the concrete for this footing ASAP as it might rain on the weekend or next week, and we can’t risk the trenches getting flooded. We have ordered 1.8 cubic meters of concrete from Boral to arrive at 12.30 on Saturday – Christian’s birthday, and also the first Concrete Pour for the house.
We have hinted (well not so subtly) that instead of a birthday present, he might like his ‘trenches dug’. Hopefully we have a great turnout of friends as our weekend workforce, and a bbq and beers on site.

Sunday, May 24, 2009

Earthworks

We tried our very best to level and compact the site ourselves this weekend – with very little success.


(check out the size of this tree stump!)


So this was a job for the experts. We commissioned Ralph Calautti Earth Moving and Site Works to do the compacting and levelling. They were in and out in a day, and left the site with a smooth and unbelievably robust surface which we could never have achieved on our own. Ralph is an awesome guy who knows his dirt really well, but hadn’t yet got into the email revolution!
Here are some photos after the compaction. We immediately started digging our main foundations for the toilet block, and setting out all our new pegs and levels.


We also finished the sign to put up the front facing Scarborough Beach Road.
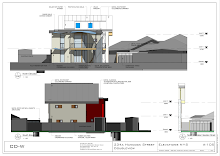
The sign features one of the red (and two of the grey) Alpolic sample off-cuts that we plan to clad the toilet block with. Alpolic is a type of Aluminium Composite cladding which is as far from sustainable as you can get – however, a lot of suppliers sell offcuts of this cladding which are left-over from large-scale commercial projects. We created a rough impression of what the toilet block would look like with all the varying sizes of cladding we found and ended up with this jigsaw puzzle.
We are a bit doubtful about it though, because even though they are offcuts and not the real thing, it is still more expensive than using standard profiled sheeting.
Anyway, many more cost-cutting and value engineering processes are yet to commence! Until then.....!